Thursday, July 25, 2019

Canning Strawberry Jam


Strawberry Jam is one of those things that most everyone loves to get. Kids eat it on PB&J, adults like it on toast, you can put it on shortbread thumbprint jam cookies and I even put it on ice cream.


What you will need:

2 quarts Strawberries
1 package of powdered pectin
¼ cup lemon juice (or 1 squeezed lemon)
7 cups of sugar

Large Stainless Steel Stock Pot
Water bath Canner
Canning jars (I use a variety of 4oz, 8oz and 12oz jars so I can give them as gifts)

This will make about 8 half-pints


Instructions:
Fresh strawberries are always best when in season.
These ones are SUPER ripe, sweet and juicy.

Wash your berries and drain. Remove stems.
Washed and tops sliced off.

Crush the strawberries one layer at a time. I use a potato masher, well rather I have the kids use the masher. There is something they seem to really enjoy about smashing up strawberries.
Kido is doing a great job mashing the strawberries up in the ice cream bucket.

Combine strawberries, pectin and lemon juice in your stock pot.

Strawberries, Lemon Juice and Pectin about to begin.

Bring to a boil, stirring occasionally. 
THEN add sugar, stirring until dissolved.

Jam just starting to boil.

Return to a roiling boil and then boil HARD 1 minute, stirring constantly. (I find that I usually need to boil a bit longer than 1 minute – right around 2-5 minutes)

Strawberry Jam boiling hard now.

Remove pot from heat.
Skim foam if needed (I never do)
Ladle hot jam into hot sterile jars leaving ¼-inch headspace.
Wipe the rims to ensure they are clean.
Then add the lids and rims to finger tightness.
Process 10 minutes in a boiling-water canner.

Jars immersed in the boiling water canner processing.
Remove from canner and set on a towel not touching each other to cool for 24 hrs. 

Jars starting to cool

Any items that do not seal should be placed into the refrigerator to be used. (OR you can reprocess them right away… but I have never had to do this)

21 Jars of Strawberry Jam all sealed!
There are 4oz, 8oz, 12oz and pint sized.


This is really an easy recipe to do and it makes great gifts around the holidays.


On Guard Essential Oil Blend


On-Guard is probably my MOST favorite oil blend there is. I use this one every day. It has so many great uses and it is very effective. Here are the ways that I use it.

IMMUNE BOOSTER - As one of dōTERRA's best-selling blends, the On-Guard blend is a highly effective immune support. dōTERRA On-Guard can be taken internally on a daily basis to maintain healthy immune function and support healthy cardiovascular function.   This is one that I NEVER leave home without. It is my GO-TO. Last year flu season hit HARD in the office I worked in and it didn't hit once, twice or even 3 times, it came in and took over in 4 waves for about 6 months. Meanwhile I was using On-Guard on the bottom of my feet daily and I never got sick, AT ALL and I was pregnant. I can't promise that you won't get sick, but I can tell you that my husband JUST had the flu and I still haven't been sick. dōTERRA On-Guard is an effective alternative to synthetic options for boosting the immune system and protection against environmental threats. That said, I still support getting a flu shot.


CLEANING - This is one that can be used on surfaces throughout the home as a non-toxic cleaner. To make your own household cleaner use a 1:1 ratio of white vinegar and water and add 20 drops of On-Guard in a glass spray bottle. We also have this as a foaming hand wash in our house. It smells amazing and I can actually get my teenage BOY to use it without being told... as much. I love that I know my family is getting an immunity boost and clean hands!

SANITIZER - To use this as a sanitizer place a drop on your hands and rub together as a hand sanitizer. I never leave home without this. I actually have this in a Sanitizer Spray Bottle (thank you dōTERRA) and I carry it in my purse. It definitely comes in handy when people want to hold the baby. I also brought this to the hospital for when people came to see baby and of course wanted to hold my baby - the "Hanitizer" (as my niece and nephew call it) was very helpful.

SKIN - Add to fractionated coconut oil to use directly on the bottom of your feet in the morning to boost your immunity all day. Confession, I put 2-3 drops in my teen's shoes… He has orthotics and frankly THEY STINK because they don't breathe much. I have found that I can kill 2 birds with 1 stone, or at least take one down a notch. I know that he will absorb the oils into his feet throughout the day and thus get some immune boosting and the essential oils will also help to keep his feet from stinking so much. It's a win-win.


TRAVEL - If you travel often, you know that it is prime time to pick up a bug. I place one drop on my tongue before entering the plane and one drop every two hours. I also place one drop on tongue after being in large groups. I have also used the beadlets for this.

ENERGY - When diffused, dōTERRA On-Guard helps to purify the air, and can be very energizing and uplifting.


If this sounds like something you would like to try, feel free to message me or you can click HERE to purchase On-Guard Essential Oil Blend


To view the entire On-Guard Product Line click HERE


If you would like to learn more about essential oils, please fill out either of these surveys and I will response accordingly.


Monday, July 22, 2019

Canning Split Pea Soup

Anyone ever have a large ham bone with lots of meat still attached after a Sunday Ham dinner? Yeh me too. This is like the holy grail for making pea, potato or bean soup loaded with flavor. I recently pulled out one such item out of my freezer and made a large batch of split pea soup, and oh man did it turn out great!

Ingredients:
1 large leftover ham bone or ham hock (the more meat attached the better)
2-3 large carrots diced
1 large onion (diced) I have used red, white and yellow... I prefer red.
2 bags of dried split peas (rinsed and checked over for stones)
1-2 cloves of garlic minced
1 bay leaf
1 tablespoon of ground allspice
black pepper to taste

1 large stock pot
pressure canner
10-12 pint canning jars, lids and rims (I use wide mouth pint and a half jars, but you can use anything from pints to quarts)
sharp knife
canning utensils

Place the ham bone with meat attached into the stock pot and fill the stock pot with water and set it over medium heat to boil. You are going to let this boil down until you have reduced the water to about 1/3 left. (This is going to take a while and your kitchen will be warm and muggy which is why I tend to do this in mass during the cooler months.)

Once you have reduced your liquid to about 1/3 full, remove the meat and bones. With a sharp knife cut/cube the ham that you want to go back into the soup. I usually chop up about 2 cups or so, sometimes more. 

NOTE: There are times where I will have too much meat and I will throw that into 1-2 pint jars and pressure can that right at the same time along side of the soup (this makes great ham mac n cheese and ham n scalloped potatoes) because the processing time is the same as the soup. Other times I will not have enough meat so I will just grab a jar of canned ham from my pantry and it does the trick. See my post on Why I Can Meat

Add the spices, chopped onion, carrot, minced garlic and peas. 

Fill the pot with about 8 more cups of water. (I usually eyeball it and fill my stock pot about 2/3 full)

Let boil until peas are almost tender. (Note I usually leave them just a bit under cooked because they will continue cooking in the pressure canner)

Remove the bay leaf.

Ladle hot mixture into hot jars leaving 1 in head-
space. Wipe rim and add lids and rims. Tighten to finger tip tightness. 

Process jars 1hr 15 min for pints and 1hr 30min for quarts. (You will need to adjust the pressure for your altitude. For my altitude I use 10 lbs of pressure)

Once done, let jars sit for 24 hrs. Lids should all be sealed. If not, I place mine in the refrigerator and consume within 2 wks. 

My soup tends to be thick and that is how I like it. When I am ready to serve it I can add a cup or 2 of water to thin it out to the consistency desired. 

If you try this please share in the comments below or show me pictures of your canning success!


Thursday, July 18, 2019

Tea Tree (Melalueca) Essential Oil


Melalueca or commonly known as Tea Tree Oil is another of my top 5 go to oils. I can't even put it away because it gets used so frequently in our house. I run out of it regularly. It is just one of those really practical oils to have on hand and it is another one that goes in the camping first aid kit.

SKIN - prevent & reduce blemishes by using nightly with coconut oil.  Helps to heal and prevent acne. I recently had a friend who burned her arms (youch) and I gave her a blend of Lavender and Melaleuca for some relief and healing aid and the next day she came up to me and was super thankful for it. It gave her quick relief and allowed her to get some sleep!
(link lavender)

NAILS - Drop on nail beds for healthy nails and rub on toenails after shower. Place a drop inside shoes to purify.

IMMUNE SUPPORT - Antibacterial. Place on cuts to heal them quickly or on tongue if you feel a cold coming on. You can also use this as a deodorant. Melaleuca is one of those oils that I keep in a first aid kit. It is like a jack of all trades when it comes to uses. I put it in ALL of my healing oil blends, ointments, and balms.

SCALP - Add to shampoo and conditioner for good scalp health and a refreshing shower. You know that Tea Tree Oil Shampoo that they use at the barber/salon? Yeh, I love it too. Put 5-10 drops of Melaleuca in your shampoo and in your conditioner for that spa sensation without spending those big bucks! It feels SOOOO good.

LIP BLEMISH - reduce length of sore by dabbing on area. You know when you buy those medicated lip balms, a lot of the time this is the oil they use in them. No joke. So why use a lip balm with chemical filled ingredients when you can you a natural and effective option?

CANKER SORES – Tea Tree is one of those oils that is just great at healing. When I get one of those pesky canker sores on my gums I will use a q-tip with a little Melaleuca oil on it and dab it on the affected area for some quick relief and healing.


If this sounds like something you would like to try, feel free to message me or you can click HERE to purchase Melaleuca (Tea Tree) Essential Oil.


If you would like to learn more about essential oils, please fill out either of these surveys and I will response accordingly.


Other Posts related to or containing Tea Tree Essential Oil

Lavender Essential Oil

Wild Orange Essential Oil


Wild Orange Essential Oil is number 2 on my most favorite list of oils. I LOVE its fresh scent! There are several ways to use it. Here are a few of my favorites…

ALERTNESS - A drop of Wild Orange and Peppermint inhaled from your hands is the perfect afternoon pick-me up. Wild orange was one of my favorites during my pregnancy. Being pregnant there are days where I was just plum tired... it’s a thing. Its citrusy scent is invigorating and uplifting and during pregnancy, when you’re am not supposed to be drinking a large amount of coffee, I definitely took advantage of what I could! A couple of drops in my palms and 5-10 deep inhalations of this – ooo so good!

MOOD - I have found that this particular oil is a really good mood lifter for me. There is just something about its clean citrus scent that puts me in a great mood. It reminds me of sunshine in the morning, when the day is all fresh, new and dewy. I actually put 2-3 drops of Wild Orange and Lavender on my pillow at night for a happy restful sleep.

COOKING / FLAVORINGI use it in my water (1 drop) and in cooking. So the other day made Orange-Blueberry Coffee cake and I used Wild Orange in my batter. Yup - You can ingest this oil from doTERRA.  I also use it in my Orange Marmalade. By the way, that coffee cake was AMAZING!!!


PREGNANCY – “When you are ready to give birth, I recommend two oils be in your birth bag: Wild Orange and dōTERRA Balance. Both are incredible at easing anxiousness.” - Stephanie Fritz  - You can bet those were in my birth bag! I had a very long labor with my first child and I remember how exhausted I was. I used this to keep calm and stay focused. I also used this on my pregnancy pillow at night with Lavender for a refreshing and relaxing nights sleep.


If this is an oil that sounds like something you would like to try, feel free to message me or you can click HERE to purchase Wild Orange.


If you would like to learn more about essential oils, please fill out either of these surveys and I will response accordingly.


Other Posts related to or containing Wild Orange Essential Oil


Tuesday, July 16, 2019

My Favorite Camping Recipes

If you are like me, you love camping... LIKE LOVE LOVE MUCH MUCH! I love being in nature, bonfires, the smell of the camp fire on my hoodie, the rustic throwback and the time with family. HOWEVER, ... This often means that when packing food for the family, convenience will often outweigh nutrition... #momofbusyboys so I often try to find ways to keep nutrition in mind while planning our meals but that are also easy to do.

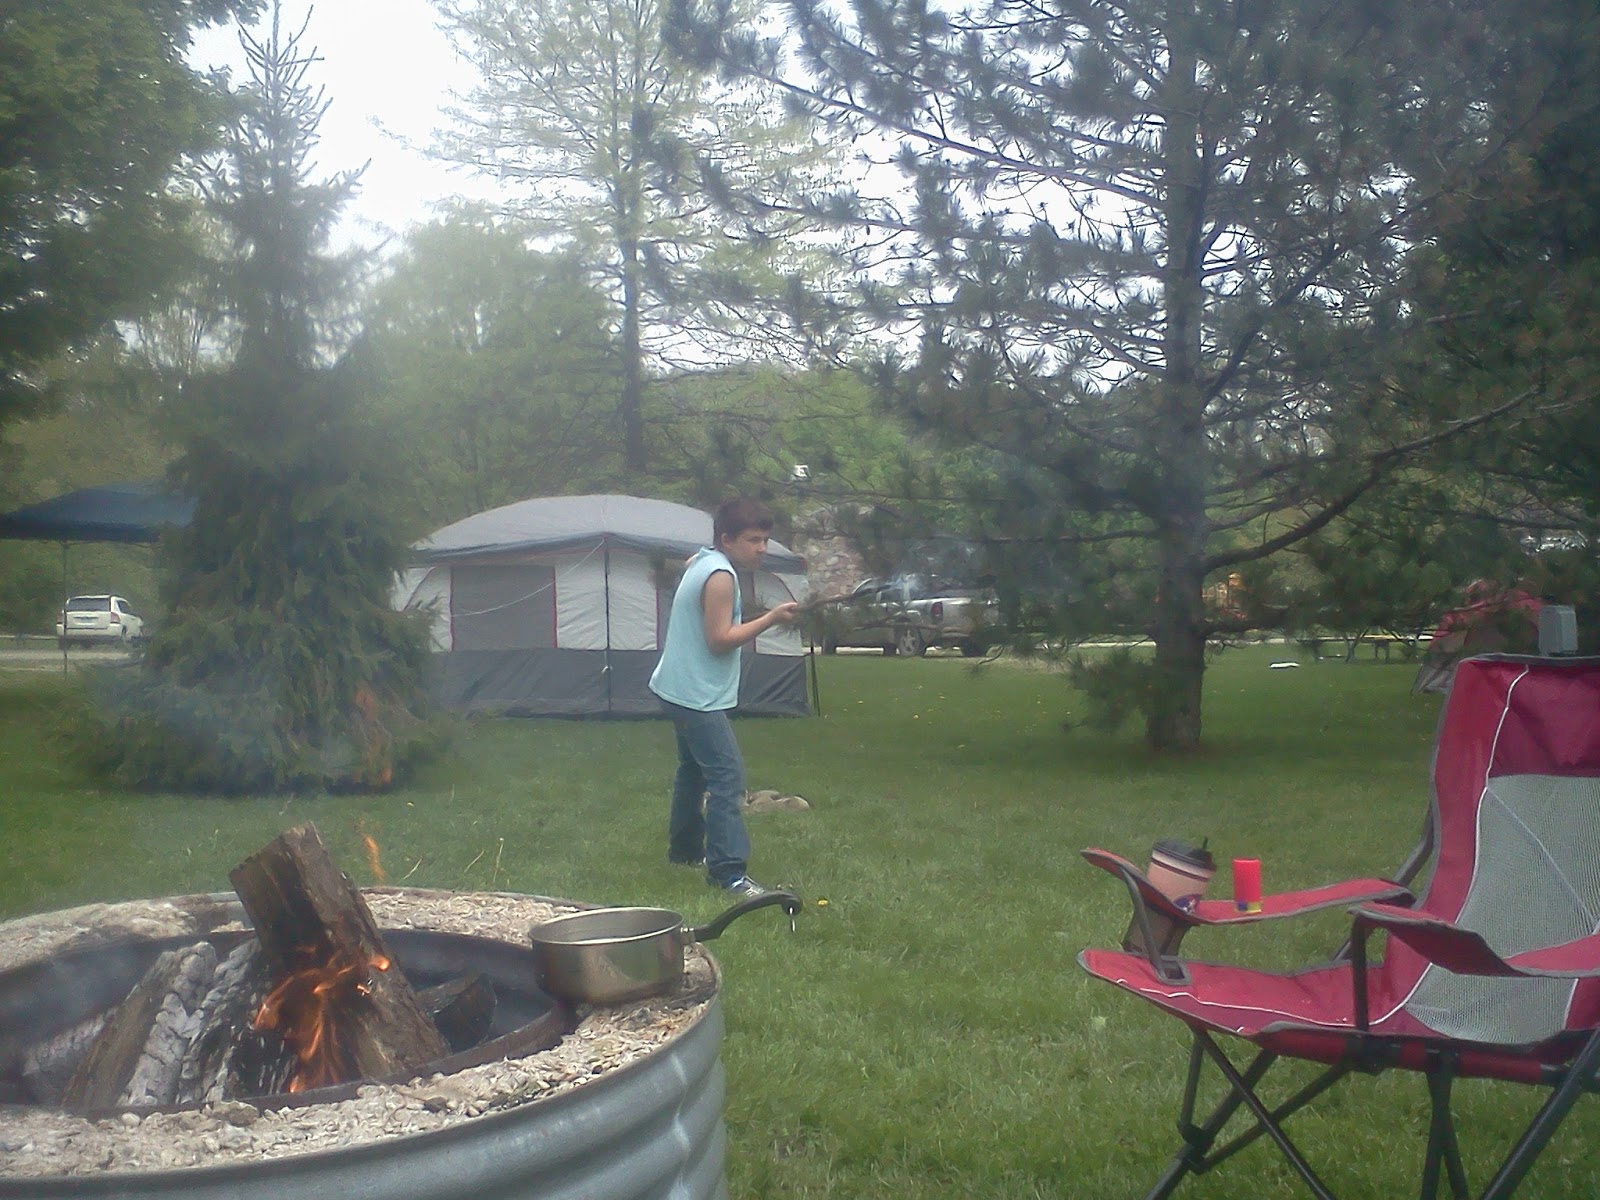
Boy Scout Camp has been Set up!
AND... I just so happen to have a son in Boy Scouts, so we have been learning a great deal about campfire cooking and I have found that cooking is quite easy to do while camping. My favorite methods are the foil packet system and pie irons for sure!


Here are some of those great recipes for camping!


Campfire Foil Cowboy Dinner

Ingredients:
¼ lb hamburger
Seasoning of choice
Sliced onion & potatoes
Mushrooms (optional)
Sliced peppers (optional)
Garlic (optional)
Can of baked beans (with juice)
Tinfoil

Directions:
Layer hamburger (normally ¼ pound and add seasonings), sliced onions & potatoes, you can also add mushrooms, peppers, garlic, etc (whatever you like) and then top with canned baked beans (with juice).  You just make a tightly sealed package and set it on a grid over the fire.  It will puff up and everything will steam inside, normally it takes approx 25 minutes and you will flip it every 10.   Open it up and enjoy!

 
Campfire Hobo Dinner
There are pretty much unlimited combinations with this.

Ingredients:
meat – chicken, salmon, kielbasa, beef, sausage, etc
vegetables – potatoes, peppers, onion, green beans, corn, etc
sauce – Asian, Italian dressing, pesto, cream of mushroom... etc
Aluminum foil
Roaring fire

Directions:
Using two sheets of aluminum foil, make an envelope and fold the edges to seal.
Add your choice of meat, vegetables and sauce. Fold to seal.
Place on grate above fire or directly in the coals.
Cook 15-30 minutes. Test potatoes for doneness. Eat hot.


Campfire Lumberjack Breakfast Packets

Ingredients:
Sausages or Canadian bacon
Frozen hash browns, or leftover cooked potatoes, diced
Eggs
Chopped tomatoes and green onions, if you like
Shredded cheese, any kind.

Directions:
~Kids love to help make their own breakfast packets! ~
Ummm... We are going to need
about 40 more...
Lay sausages or Canadian bacon on a double layer of foil that has been sprayed lightly with cooking spray.
It is best to have the meat on the bottom so it can receive direct heat from the grill to cook properly.
{Leave out the sausages if you don't like meat, and just start hash browns and a big dab of butter.}
On top of the sausages, add a handful of frozen hash browns or diced leftover potatoes, an egg or two, and diced tomato and green onion if you like.
Salt & pepper to taste.
You can also add Cajun spice, or Old Bay spice or whatever spice your family likes.
Wrap up packet and place on a hot BBQ for 15-20 minutes or until meat is thoroughly cooked.

After the packet has cooked for 15-20 minutes...
I like to open it up and add shredded cheese and put it back on the BBQ with the cover down to melt the cheese for a few minutes.


Campfire Potato Boat Dinner with Ham, Cheese & Bacon

This meal is so, so easy but it does require some planning and a bit of prep...it's a great idea to bake the potatoes before you leave home and wrap them in tin foil to take on the camping trip..and keep them chilled.
 
For this recipe, you will need:
Large potatoes, baked
Sliced ham
Cooked bacon slices
cheese slices {we like marble}
Sour cream for topping
Green Onion for topping

Directions:
Slice baked potatoes like shown. 
Between the cuts, stuff a slice of cheese, bacon and ham.
Add small dabs of butter on top of each of the slices. Salt & pepper to taste.
Wrap potato in double layer of tin foil lightly sprayed with cooking spray.
Place on a hot BBQ for 20+ minutes...until potato is hot and cheese, ham & bacon have melted together, and it looks toasty and good!
Top the Potato Boat dinner with sour cream and green onion if you like.
The Potato Boat has so many possibilities...you could leave out the ham & bacon and just add cheese and broccoli, or chili, or cooked taco meat.


THINGS I HAVE COOKED IN A PIE IRON… 
Oh man… this is one of those things that I cannot go camping without. Pie Irons are the best!  They are fun, easy and one of those camping memories every kid should have. Here are some things I have cooked in pie irons...
Tater-Tot Casserole in a Pie Iron - yes for real


Pizza
Ham N Cheese
Mini Tater-tot Casserole
Ruben
Bagel Sandwiches
Chicken Pot Pies
Hot PBJ
Fruit Pies
Omelets 
Breakfast Burritos
Regular Burritos
Cinnamon Rolls 

Tater-Tot-Casserole

Ingredients:

Frozen Hash brown patties, thawed

Cream of Mushroom Soup

Pre-Cooked ground beef crumbles

Cheddar cheese, shredded

French-cut Green Beans, drained

French friend onions

butter


Directions:

Grease iron

Use 3 hash brown patties per pie iron.

Cut one patty in half and press 1 & 1/2 patties into buttered pie iron.

Patch holes with hash-brown pieces

Mix drained beans, cheese, french fried onions and ground beef (I find a zip-lock does the trick well)

Top with spoonful of ingredients.

TIP

Sear both sides over high heat, then move to a cooler spot.


Campfire Bagel Sandwich

Ingredients:
Bagels
Lunch meat
Cheese

Directions:
Wrap in tinfoil
Toss into fire until cheese is melted
This can also be done with pizza sauce, cheese and pepperoni


Pie Iron Pizza Pies

Pizza Pocket Pies
Ingredients:
Sliced Pepperoni
Pizza Sauce
Shredded Mozzarella Cheese
Bread (you can also use crescent roll dough)
Butter

Directions:
Top one piece of buttered bread (or  with Pepperoni. Add Shredded mozzarella. Now add Pizza sauce – careful not to overflow it, 2 – 3 tbsp) add a bit more cheese and cap with second piece of buttered bread.
Close and cook as above, 3 minutes per side.
Place on plate and enjoy


 Pie Iron Ham & Apple Grilled Cheese
Hmmmmm Yummy

Ingredients:
bread,
shredded cheddar cheese,
shaved smoked ham (deli),
apple slices

Directions
Spread a layer of shredded cheese on one piece of bread. Top with a generous portion of shaved ham.
Sprinkle a little more shredded cheese and add a layer of thin apple slices.
Top with another thick layer of shredded cheese, then cap with second piece of bread. (remember, one side generously buttered)
Close and cook as above, 3 minutes per side.


Enjoying Campfire songs

Pie Iron Reuben

Ingredients:
Rye bread
shaved corned beef
Swiss cheese
Sauerkraut
spicy mustard

Directions:
Spread thin layer of spicy mustard on bread.
Top with a generous portion of shaved corned beef, then a slice of Swiss cheese.
Spread a couple spoonful's of sauerkraut over cheese, season with ground black pepper, then top with another slice of Swiss cheese.
Cap with second piece of buttered bread, (also with a thin smear of spicy mustard).
Close and cook as above, 3 minutes per side.
Place on plate and enjoy


Pie Iron Sweet Pies

Ingredients:
Your choice pie filling (Cherry, Apple, Strawberry)
Bread
Butter
sugar

Directions:
Top one piece of buttered bread with pie filling – careful not to overflow it, 2 – 3 tbsp). Cap with second piece of buttered bread.
Close and cook as above, 3 minutes per side.
Place on plate and sprinkle both sides with sugar – while still hot.


Goofing around with S'mores
Peanut Butter S’mores

Ingredients:
bread
peanut butter
graham crackers
chocolate bars
mini-marshmallows

Directions:
Thickly spread peanut butter on one piece of bread. Top with chocolate bar and mini-marshmallows, then cap with small broken pieces of graham cracker. Finish with second piece of bread.
Close and cook as above, 3 minutes per side.


Campfire Sizzle Sticks (this is one of my favorites)

Ingredients:
1/4 c chopped fresh mystery herb (mint, parsley, your choice)
1 tsp diced fresh ginger
2 cloves diced garlic
1/2 tsp ground cumin
1 tsp ground coriander
1 tsp salt
1 tsp Greek Grind - dried Greek seasoning found at our local farmers market
1/2 tsp cayenne pepper
1 lb ground meat - I used beef but lamb, pork or turkey would be yummy too!
Metal or bamboo skewers

Directions:
Mix together the dry ingredients. Then take a deep breath and put your hands into the ground beef to combine the ingredients well
Form the meat into balls (6 worked for me) and skewer.
Form a sausage around the skewer and barbecue


And of course, we can’t forget the classic Walking Taco. Also known as Dump-N-Crunch in our house. Just watch the fun as the kids dump in their ingredients, crunch, scrunch, and shake to mix, and then dig in.

All you need to do is make sure they don’t get carried away with the crunching and shaking. This camp recipes for kids isn’t just delicious – it’s fun too.
The concept is so simple. Each camper spoons the ingredients they want into their individual bags of chips. Then they just scrunch them a little to mix things up – and they’re done! Eat with a plastic fork or spoon and toss everything in the trash for clean-up.

Note:

A little prep at home can make this a no-cook, fast and easy camp meal. Just cook the hamburger/taco seasoning mix at home and bring to camp in a gallon-size Ziploc. (can be served cold at camp or warmed in a skillet)

The vegetable slicing and dicing can also be done at home and brought to camp in Ziplocs.

Then it’s just a matter of putting things out for the kids to use.


TIPS FOR CAMPING

Dice up all your veggies and put them into Ziploc bags
Onions
Green Bell Peppers
Red Bell Peppers
Potatoes
Tomatoes

Hard Boiled Eggs – having these on hand is helpful for quick no fuss breakfasts.

Snack Bags:
Any mix of Nuts, Dried Fruit, M&Ms, Goldfish, Chex Cereal works. Pre-portion them out for on the go. I find it help to keep the kidos happy so you can enjoy your camping too.

ALWAYS bring extra zip lock bags (sandwich size and gallon sized)

Always bring skewers for roasting things over the fire. Anytime a child/adult can cook their food over a fire/grill is great fun.
 
Hotdogs
Braats
Smores
Sizzle Sticks
Chicken Strips
Kabobs


Send Me A Message

Name

Email *

Message *