Tuesday, February 28, 2017

Start Eating Clean with the 8-Week Transition Diet

Start Eating Clean with the 8-Week Transition Diet

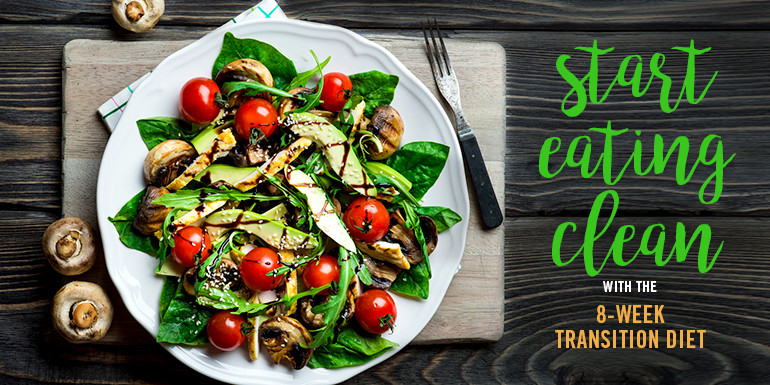
Transition diets are one of the easiest ways to become a healthier eater. They’re not only great for first-time dieters but are also great for any time you feel like cleaning out your system after a period of slacking off. 
It’s often said that no one diet works for every individual. While this is true, you may have noticed that all Beachbody eating plans target a similar goal: Eat more natural, whole foods and less junk. That’s because there are no secrets to healthy eating. There are strategies that can lead to various performance benefits, but 99% of the goal of eating healthy is to minimize junk and get your diet to consist of real food (you know, the stuff nature makes). With this in mind, Beachbody nutrition guides use various strategies, all designed to lead you to the same place.
While those nutrition guides tend to be detailed, the 8-Week Transition Diet is for those of you who want simple. Outside of a small list of what you can’t eat, you’re free to chow down on anything. How hard can that be? You should also find that by making your transition gradually, the road to healthy eating is pretty easy.

Week 1

No junk. Eliminate junk food from your diet. That’s it, just junk. Other than this, you can eat whatever and whenever you like. The definition of junk is obvious stuff, like potato chips, candy, ice cream, cake, etc. You may be stricter if you’d like, but for Week 1, don’t be too hard on yourself. Just stay out of 7-Eleven. For many of you, this step alone will reap huge benefits.
Cheat Days: 2. Since no one’s perfect, you get two days to cheat. That’s right, two days where you can eat anything you want! A trick on cheat days is to listen to your body. At first, it’ll probably tell you it wants whatever you’ve been denying it. However, over time, it’ll start to crave nutrients you’re deficient in. Learn to read your body’s subtle signs. If you’re craving ice cream, you may be short on essential fatty acids. If you crave a hamburger, your diet may lack protein. By listening to your body and learning what it really needs in this way, you can make better food substitutions. It’s a way of getting in tune with yourself that will benefit you for your entire lifetime.
Weekly focus: Water. Not swimming in it, though that’s good too, but staying hydrated with it. “They” say you should drink at least 6 to 8 glasses of water per day, but I say you should drink more. Shoot for a gallon (though don’t worry if you fall short). Yeah, that probably seems crazy but almost all of us walk around dehydrated for most of our lives, which not only hurts the way we function but also makes us hungry when we’re actually thirsty. A glass of water when you feel hunger pangs both staves them off and helps you fill up faster when you do eat. As for other drinks, juices and sugary sodas also (obviously) fall into the junk category. And alcohol should be kept to a minimum. We tend to forget (purposely or not) that alcohol has calories. A lot of them: 7 calories per gram. Mixers can be even worse — not only can they add calories, but these sugary calories influence the way alcohol reacts with your body.

Week 2

Each week’s rules are cumulative, so the “no junk” rule from Week 1 will apply until the end, as will each subsequent week’s rule. Remember that this is a process. Treat it as though you’re in school and the subject is your own body.
Eat small, eat often. Eat every couple of hours while you’re awake and try not to eat anything for about three hours before you go to sleep. Following these rules will keep your blood sugar levels more static and your energy level will stay consistent. Try to keep each snack or meal balanced. Something like a 30% protein, 40% carbohydrate, and 30% fat ratio, though you don’t need to worry too much about it. Just realize that you need a bit from each macronutrient group. Eat based on what you’ll be doing for the next few hours (if you’re working out, eat a little more; sitting at a desk, eat a little less). The three-hours-before-bed rule is important, especially for fats and carbohydrates. By allowing time for all the carbs you eat to get into your bloodstream, your body will sleep in fat-burning mode, rather than in calorie-storing mode. This is important because undigested carbs in your stomach at night are stored as adipose tissue (fat).
Cheat Days: 2
Weekly focus: Carbs are not the enemy. Your body needs them, just like it needs proteins and fats. The trick is to choose the right carbs. As a society, we eat too much refined sugar. Complex carbs, like whole-grain breads, whole-grain rice, sweet potatoes, and legumes are outstanding foods. Even fruits, which have simple carbohydrates wrapped in fiber, are exceptionally healthy. While you don’t want a diet based on nothing but carbs, making the right carb choices will maximize your body’s potential. Try to avoid white rice and flours. Read labels, and try to avoid ones that use the word “enriched,” because this means these products have been stripped of their natural nutrients, over processed, and then fortified with a few random nutrients.

Week 3

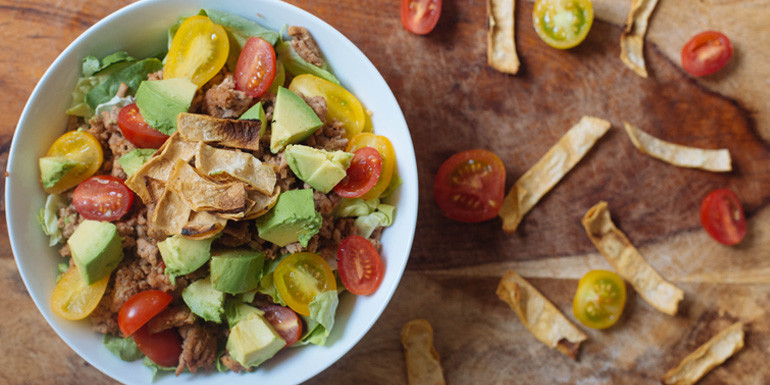
Eat some colorful, low-density food at every meal. These are foods that take up a lot of space without a lot of calories. Veggies are the most obvious example. You can eat a salad bowl overflowing with lettuce and veggies and you most likely won’t exceed 100 calories. By eating low-density foods like veggies and fruits, you’ll keep your portions under control naturally, because they have very few calories for their size. Conversely, high-density foods, like chocolate and butter, are loaded with calories in even the smallest amounts. So beware of salad dressings and other things you add to salads and veggies. Only add enough for flavor; don’t fill up on them. When it comes to live foods, the richer the colors, the fresher the products tend to be. Try to eat a variety of colors in your diet. This simple-yet-random-feeling act will help ensure that you’re covering all your nutrient bases.
Cheat Days: 1
Weekly focus: Protein at every meal. This becomes even more important as you eat more low-density food, because protein tends to be high-density. Many veggies have a lot of protein, but the quantity you must consume starts to become prohibitive. Try to get some protein — meat, dairy, legumes, nuts, or seeds each time you eat, especially when you’re working out hard, because you need to repair broken-down muscle tissue. Since your body can only utilize a certain amount of protein at once, do your best to eat small amounts often (starting to see a theme?). Reading labels is a simple way to learn how to estimate your protein intake. You’ll notice natural foods don’t have labels but once your diet is comprised mostly of these you’ll no longer need them. More on this later.

Week 4

Cook at home. One of the best ways to control your eating is to prepare all your meals yourself. Eliminate all fast food (which hopefully happened in Week 1) and most other restaurant food. You may still eat food from certain restaurants where you can be sure of the ingredients (most will be savvy enough to make a point of how healthy their food is). As you may have seen in the news, restaurants tend to use alarming quantities of salt, among other things. This single step will often bring your body closer to homeostasis (its desired state of balance). This can be hard for many of us because we now have to plan our meals and prepare ahead of time, but try to treat it like vocational school — you don’t learn a new “job” without a little retraining.
Cheat Days: 1
Weekly focus: Fat is essential. Remember that fat is a vital part of your diet, not just something that makes you fat. What is not vital is junk fat in processed foods. Healthy fats come from fish, nuts, seeds, avocados, olives, etc. — natural sources. You need to be careful about the amount of fat you eat because it’s very dense. At 9 calories per gram, it contains more than double the calories of carbs and protein.

Week 5

Reduce starchy carbohydrates. Starches include rice, bread, potatoes, corn, beans, and other legumes. While many of these are in no way bad foods, most of us eat too much of them. The goal here is to cut way down on them, if not totally out, and then add them back in when your body feels like it needs energy. This will teach you the relationship you have with carbs. They are vital for energy but eating too many of them leaves us lethargic (and eventually fat). Once you figure this out, your entire relationship with food will change.
Cheat Days: 1
Weekly focus: Sugar is only beneficial after a hard workout or during a long one. Your body doesn’t need processed sugar. But if you really enjoy it and can’t avoid letting some sneak into your daily diet, the one-hour period after you exercise is the best time to indulge. During this window, your blood sugar is low, because you’ve used it up to finish your workout (assuming you pushed yourself), and eating sugar during this time will help you recover faster because it speeds into your system and initiates the recovery process. Adding a little protein, but not too much, will enhance your recovery even further.

Week 6

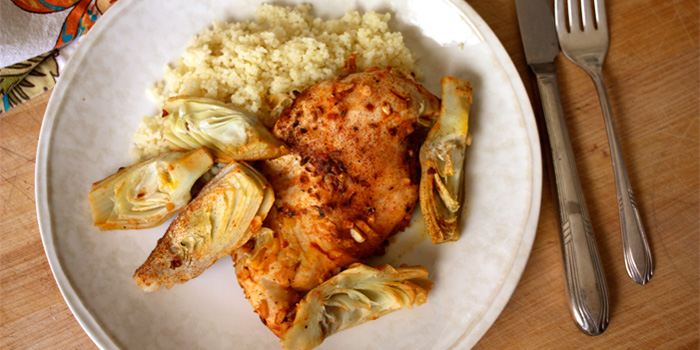
If man makes it, don’t eat it. This is likely to be the hardest week of your diet. You want to eat only whole foods and eliminate all processed foods, even good ones, for the week. This includes breads, most salad dressings, all cereal, luncheon meats, cheese, dried fruits, anything with preservatives, and alcoholic beverages. What you can eat are whole foods such as fruit, raw or steamed vegetables, meat (sans any type of sauce), natural whole-grain rice, poached eggs, etc. Since your eating habits have been slowly changing, this shouldn’t be that big a shock to your system, but it will still likely be hard. Try and get creative. There are now many raw and whole food “cook” books that can help keep you entertained.
Cheat Days: 1. The “cheat day” mentality is a good one. Decadent desserts, a night at the buffet, drinking with friends, etc., can be good for you as long as they are rewards and not habits. Studies proving this have been steadily appearing for about as long as we’ve been studying things. All work and no play does, indeed, make Jack a dull boy.
Weekly focus: Nuts and seeds make great snacks. A handful of raw almonds or cashews is a quick and easy snack that goes a long way. Don’t be put off by the high fat count of nuts, because this means it takes fewer of them to satiate you. Nuts and seeds are loaded with important phytonutrients, as well as good fats, proteins, and fiber.

Week 7

Be yourself. No rules — just try and eat as healthily as you can and do it by feel. Trusting yourself might seem like a lot of responsibility, but by now you’ll be up to it. Learning to eat by feeling what your body needs is an important step in your transformation. Consider the way you’ve been eating over the last six weeks, but don’t worry about what you should and shouldn’t do. Just fuel yourself. The point is to take a mental break. Relax and allow yourself to eat in a way that feels normal. You may be surprised to find yourself craving something healthy instead of a candy bar or soda. You’ll be better at listening to your body because it’ll tell you what it needs to eat, as opposed to what you’re used to eating. Your body should feel somewhat transformed.
“Reward for a Life Well Lived” Days: 1
Weekly focus: If you’re so hungry at night that you can’t sleep, try a protein shake. A recent study confirmed what’s been a focus of this diet for two decades; that protein before bed can raise amino acid activity for a full night of rest.

Week 8

Eat a perfect diet. Let’s get after it. No one is better able to tell you what you should eat than you. Our bodies are all different, and the key to your own perfect diet is learning about how your body reacts to different foods under different circumstances. Your journey over the last seven weeks should have brought you to a new understanding of how food affects your body, both for good and for bad. The time has come to test it. See how well you can eat for a week. In fact, see how well you can eat for the rest of your life. Live and enjoy.
Reward Days: 1, of course!
Weekly Focus: Don’t bonk. Bonking is a state when your body runs out of blood sugar and glycogen for energy. If you feel like your workouts are going backward instead of forward, this is a likely culprit. Use your energy level as your gauge. As soon as it starts to drop, start adding carbs back into your diet until you feel energized all day long. When you feel energized during your workouts and the rest of the day, you’ll know you’ve found the right balance between carbs and other nutrients. Also, remember that as your body puts on more muscle, you will need to eat more. Muscle weighs much more than fat, so as you gain muscle and lose fat, your body shrinks without losing weight. You will also require more calories in order to maintain your muscle. So, when you’re working out hard, don’t be afraid to eat more carbs than you do otherwise.

Author: 

Turkey, Goat Cheese, Avocado Roll-ups

Turkey, Goat Cheese, and Avocado Rolls
This power snack from the Body Beast Eating Plan will fuel you through a sluggish afternoon or satisfy late-night cravings. And it’s so easy to make. Wrap crunchy romaine lettuce leaves around sliced turkey, avocado, goat cheese, and walnuts for a delicious, low-carb snack.
Total Time: 15 min.
Prep Time: 15 min.
Cooking Time: None
Yield: 4 serving, 1 roll each
Ingredients:
4 leaves romaine lettuce
4 slices nitrite-free smoked turkey (or roast beef)
4 Tbsp. soft goat cheese
4 Tbsp. chopped walnuts (or pecans)
4 slices medium avocado
Chopped red bell pepper (for garnish; optional)
Preparation:
1. Top each lettuce leaf with a turkey slice.
2. Spread each turkey slice with 1 Tbsp. goat cheese.
3. Sprinkle 1 Tbsp. walnuts on each roll and top with 1 slice avocado. Roll and garnish with chopped bell pepper, if desired.
Turkey, Goat Cheese, and Avocado Rolls

Taco Salad

Taco Salad Recipe | BeachbodyBlog.com
There’s a problem with taco salads. They sound like a good choice if you’re watching your calorie intake, but, in fact, they’re one of the worst. Whether called a “Taco Salad” or a “Tostada Salad,” these Tex Mex “salads” are usually overloaded with beef, cheese, sour cream, and guacamole then piled into a giant fried tortilla shell and smothered in dressing. Oh yeah, and a little lettuce is thrown in. Because it’s a “salad.” Calorie estimate for one of these so-called salads? Around 1500.
So, lets give the classic taco salad a makeover and create a light and healthy taco salad recipe. Swap out ground beef for seasoned ground turkey, loaded it up with lots of crisp lettuce and juicy tomatoes, avocado, and a generous serving of crunchy tortilla strips on top.
You can season the ground turkey meat with our recipe for homemade Taco Seasoning Blend, which can be customized to your liking by adding other spices like cayenne for heat, or smoked paprika for rich smoky flavor. Or, if you’re short on time, you can use a store-bought taco seasoning packet. Packaged seasonings can be high in sodium and contain artificial flavors, so look for one that is low-sodium and as natural as possible.

Taco Salad Recipe | BeachbodyBlog.com

Taco Salad

Total Time: 34 min.
Prep Time: 15 min.
Cooking Time: 19 min.
Yield: 4 servings
Ingredients:
2 tsp. olive oil
1 lb. raw 93% lean ground turkey
1 Tbsp. Taco Seasoning Blend (or packaged low-sodium taco seasoning)
¼ cup water
Nonstick cooking spray
8 (6-inch) corn tortillas, cut into strips
½ medium ripe avocado
1 Tbsp. lemon juice
1 dash garlic powder
Sea salt (or Himalayan salt) (to taste; optional)
6 cups shredded lettuce
4 medium tomatoes, chopped
Preparation:
1. Heat oil in medium nonstick skillet over medium heat.
2. Add turkey; cook, stirring frequently, for 5 to 7 minutes, or until no longer pink.
3. Add taco seasoning and water; cook, stirring frequently, for 5 to 8 minutes, or until most water has evaporated. Remove from heat. Set aside.
4. Heat a medium nonstick skillet pan over medium high heat. Lightly coat skillet with spray. Add tortilla strips; cook, stirring constantly, for 3 to 4 minutes, or until crisp and golden brown. Set aside.
5. Mash avocado in a small bowl with a fork.
6. Add lemon juice, garlic powder, and salt (if desired); mix well.
7. Divide lettuce evenly between four serving bowls. Top with turkey mixture, tomatoes, avocado mixture, and tortilla strips; serve immediately.
Calories in Taco Salad Recipe | BeachbodyBlog.com
Photos by Amanda Meixner and Dani Paris

Saturday, February 25, 2017

Baked Moroccan Chicken

Baked Moroccan Chicken
Make a weeknight dinner extra-special without any extra work. The preparation for this flavor-packed chicken dish couldn’t be any easier. The Moroccan spices dress the tender chicken to perfection.
The recipe calls for Preserved Meyer Lemon, which you can learn to make here. The flavor of the dish really benefits from the bold, lemony taste of preserved lemon. If you don’t have any, you can use a vegetable peeler to remove strips of lemon peel from a whole lemon, being careful to avoid the white pith underneath.
Total Time: 45 min.
Prep Time: 20 min.
Cooking Time: 25 min.
Yield: 4 servings
Ingredients:
4 (4-oz.) raw chicken breasts, boneless, skinless
Preserved Meyer Lemon, pulp removed, chopped
2 Tbsp. olive oil
4 cloves garlic, finely chopped
1 thin slice fresh ginger, finely chopped
1½ cups frozen artichoke hearts, thawed
1 cinnamon stick (or ½ tsp. ground cinnamon)
1 tsp. ground black pepper
1 tsp. cumin seeds
1 tsp. paprika
1 tsp. crushed red pepper
¼ tsp. whole cloves
1 large pinch saffron
Preparation:
1. Preheat oven to 450° F.
2. Combine chicken, Preserved Lemon, oil, garlic, ginger, artichoke hearts, cinnamon, pepper, cumin, paprika, red pepper, cloves, and saffron in a large bowl; mix well.
3. Arrange chicken mixture in a baking dish. Bake for 20 to 25 minutes, or until chicken is no longer pink in the middle.
4. Serve chicken with couscous if desired.
Tip: To use preserved lemon, wash lemon and remove pulp. Thinly slice or chop rind.
Nutritional Information (per serving) not including couscous:
Calories: 206
Total Fat: 10 g
Saturated Fat: 2 g
Cholesterol: 67 mg
Sodium: 822 mg
Carbohydrates: 6 g
Fiber: 3 g
Sugar: 0 g
Protein: 24 g
P90X/P90X2 Portions
1 Protein
1 Condiment
½ Fat
P90X3 Portions
½ Carb
1 Protein
1 Fat
Body Beast Portions
1 Vegetable
2 Proteins
2 Fat
Containers
½ Green
1 Red
1½ tsp.

Preserved Meyer Lemons

If life gives you lemons, you’re in luck! Use this simple technique to preserve them, which brings out their lemony flavor and makes them less bitter. You’ll have a secret ingredient in the kitchen that will add wow-factor to almost any dish without adding calories.
Preserved lemons are especially suited for Mediterranean, North African, and Indian cuisines, or any dish that calls for lemon. They tie all of the flavors together in this Baked Moroccan Chicken recipe. Add them to grain or bean salads in place of lemon zest, chop some into a simple pasta, or top chicken, fish, or shrimp. Preserved lemon can also be blended into salad dressings and sauces for a more intense citrus flavor. Shake up your salsa, guacamole, and hummus by adding a wedge of one preserved lemon.
Preserved Meyer Lemons | BeachbodyBlog.com
Preserved Meyer Lemons
Total Time: 12 hr. 20 min.
Prep Time: 20 min.
Cooking Time: 12 hr.
Yield: Approximately 8 to 10 preserved lemons, or 24 servings, ¼ lemon each
Ingredients:
8 Tbsp. kosher salt (or sea salt or Himalayan salt), divided use
8 – 10 medium Meyer lemons, washed, ¼-inch removed at each end
1-quart sterilized canning jar
4 Tbsp. fresh lemon juice
1-4 drops of Lemon Essential Oil (Optional)
Preparation:
1. Place 2 Tbsp. salt in the bottom of the jar. Set aside.
2. Cut lemons in quarters lengthwise, but do not cut all the way through to the bottom.
3. Gently pull lemons open and sprinkle inside and outside with 4 Tbsp. salt.
4. Place lemons in jar; sprinkle with remaining 2 Tbsp. salt.
5. Top lemons with juice; (optional: add 1-4 drops Lemon Essential Oil) seal jar.
6. Let jar sit at room temperature for 2 to 3 days, turning upside down every day.
7. Put jar in refrigerator, turning upside down every few days, for 3 weeks, or until lemon rinds soften.
Tip: To use preserved lemon, wash lemon and remove pulp. Thinly slice or chop rind.
Calories in Preserved Meyer Lemons | BeachbodyBlog.com
Photos within post by Kirsten Morningstar

Friday, February 24, 2017

8 Standing Yoga Poses for Beginners

Yoga’s benefits are impressive. It increases your range of motion, calms the mind, can relieve physical and emotional pain, reduces stress, and much more. But, if you’ve never tried it, it can also be intimidating. Whether you fall into that camp or you practice regularly, here are 8 common standing yoga poses for you to practice at home. They’ll not only improve your posture, they’ll also help you strengthen your arms, core, shoulders, and legs.

Mountain Pose (Tadasana)
It doesn’t look like much, but Mountain Pose is a starting position for many other standing yoga poses. Stand with your big toes touching, heels slightly apart. If you find it hard to balance, separate your feet slightly, then flex the quadriceps and rotate the thigh muscles inward, opening up the sit bones and your lower back. Engage your core and tuck in your tailbone. Finish by expanding your chest by pulling your shoulders back and down, lengthening your neck, and tucking your chin in slightly.
Standing Yoga Poses Mountain

Standing Forward Bend (Uttanasana)
The forward bend is a very natural transition from Mountain Pose and an easy standing yoga pose for beginners. Begin with your feet hip-distance apart. Hinge forward from your hips, keeping your spine straight, and bring your torso toward your legs. Reach your arms toward the floor, and let your head hang. If you’re finding this pose difficult, bend your knees slightly. To intensify it, wrap your arms around your legs and pull your chest closer to your thighs. The Standing Forward Bend strengthens your knees, thighs, and core and may help relieve pain in the hamstrings, lower back, and hips.
Standing Yoga Poses Forward Bend

Warrior II (Virabhadrasana II)
Warrior II strengthens and stretches the body at the same time, giving you the feeling of a strong, fierce warrior. Assume a wide stance, with the toes of the back right foot pointed at 45 degrees so it aims towards the top right corner of the mat. Set your left foot parallel with the short side of the mat. Keeping your right leg straight, bend your left knee so that it is parallel with the left ankle and press firmly on the outside edge of the right foot. Tuck in your tailbone, align your shoulders with your hips, and reach your arms out so that they’re parallel with the floor. Your shoulders should be relaxed and pulled away from your ears. Finally, lengthen your neck and gaze out over your left arm. Repeat on the other side. This pose strengthens your ankles, legs, glutes, core, and back.
Standing Yoga Poses Warrior II

Tree Pose (Vrksasana)
Weight-bearing exercises help build strong bones and the Tree Pose is no exception. This standing yoga pose is also a way to ease in to more complicated balancing poses. To begin, start in Mountain Pose with your feet hip-distance apart. Keeping your hands at your hips, slowly raise, then press the sole of the right foot into your left calf muscle or left inner thigh, taking care to not press it into the knee. To help you balance, press your foot into your leg and your leg into your foot. Once you feel stable, you can can press your hands together in front of your chest, raise them above your head, or stretch them out to the sides. This pose also helps strengthen the ankles, calves, quadriceps, thighs, glutes, and core.
Standing Yoga Poses Tree

Reverse Warrior (Viparita Virabhadrasana)
This pose has all the benefits of Warrior II, plus an added stretch for the spine. To perform it, assume the Warrior II position with your left leg forward, reach your right arm toward the back of the mat, running your hand down the outside edge of your straight right leg. Reach your left arm up and over the head, without bending your elbow, and stretch the neck by looking back and down at the floor behind you. Repeat on the other side.
Standing Yoga Poses Reverse Warrior

Extended Side Angle (Utthita Parsvakonasana)
Extended Side Angle is similar to Reverse Warrior, but it stretches the other side of the body, making it a good transition from Reverse Warrior. Assume the Warrior II position with your left leg forward, then fold your upper torso toward your bent leg and rest your left elbow on your left quad, palm up. Reach the right arm directly over your head without bending the elbow. Sink deep into the left hip so you can create a straight line from the outer edge of the right foot to the right fingertips. This standing yoga pose does an excellent job at strengthening the calves, quads, hamstrings, and groin and stretching the legs, hips, spine, waist, chest, shoulders, and arms.
Standing Yoga Poses Extended Side Angle

Triangle Pose (Utthita Trikonasana)
Triangle Pose looks easy, but if you have tight hamstrings or hips, you may find it challenging. That doesn’t mean it’s not for beginners. It just may take some time to perfect. Begin in Warrior II with your left foot forward. Straighten your left leg and reach your arms out in a T formation. Keeping your arms parallel to each other, bend toward the inside of the front leg until your fingertips reach the ground. Rotate your right shoulder up and back and reach for the sky, turning your gaze upward along the right arm or to the floor for balance.
Note: If you’re feeling inflexible, place a block under your hand to take the pressure off of your hips and leg.
Standing Yoga Poses Triangle Pose

Downward Dog (Adho Mukha Svanasana)
This classic pose is one of the first that many new to yoga learn. It’s also great for stretching out the calves post-workout. Begin on your hands and knees, with shoulders over wrists and hips over knees. Spread your palms and press your hands into the floor. Press into your hands, lift your knees, and push yourself up and back. Lift your bottom high to the sky and straighten your legs as you rotate your straightened arms outward and draw your shoulders away from your ears. Let your head hang and rotate your thighs inward, opening up your sit bones. Work your heels toward the floor until they eventually touch the ground. This pose strengthens and stretches the whole body, particularly legs, arms, hands, feet, core, chest, and back.Standing Yoga Poses Downward Dog
Photos by Lulu Lam
Author: 

Healthy Fish Tacos

This recipe for Healthy Fish Tacos captures all of the fresh flavors of a true Baja-style fish taco. Cod is lightly seasoned with salt and grilled (or broiled) until moist and flaky. Fish cooks quickly, so keep an eye on it until it’s done to your liking. If you have access to freshly made whole wheat tortillas, you would be a very lucky cook. For these, I used sprouted, whole-grain tortillas that I warmed on a flat pan. I then topped them with shredded green cabbage, a fresh pico de gallo salsa, and a lighter version of créma made with yogurt and lime juice. A squeeze of lime is the finishing touch.
Watch the video below to see how they’re made!
Total Time: 30 min.
Prep Time: 20 min.
Cooking Time: 10 min.
Yield: 4 servings
Ingredients:
2 Tbsp. low-fat (1%) plain yogurt
3 Tbsp. fresh lime juice, divided use
3 Tbsp. finely chopped cilantro, divided use
1 medium tomato, chopped
½ medium onion, chopped
1 medium jalapeno, seeds and veins removed, chopped (optional)
1 lb. white fish (like cod, halibut, or mahi mahi), washed, patted dry
Sea salt (or Himalayan salt) (to taste; optional)
4 (6-inch) whole wheat tortillas, warm
1 cup shredded cabbage
4 lime wedges (for garnish; optional)
Preparation:
1. Preheat grill or broiler on high.
2. To make yogurt sauce, combine yogurt, 2 Tbsp. lime juice, and 1 Tbsp. cilantro in a small bowl; mix well. Set aside.
3. To make salsa, combine tomato, onion, jalapeño (if desired), and 1 Tbsp. cilantro in a small bowl; mix well. Set aside.
4. Season fish with salt if desired.
5. Grill or broil fish for 4 to 5 minutes on each side, or until fish flakes easily when tested with a fork.
6. Evenly top tortillas with fish, cabbage, and remaining 1 Tbsp. cilantro. Drizzle with remaining 1 Tbsp. lime juice, and yogurt sauce; garnish with lime wedges. Serve with salsa.
Grilled Fish Tacos Recipe | BeachbodyBlog.com

Taco Seasoning Blend

Taco Seasoning Blend | BeachbodyBlog.com
This homemade spice blend is about to become your secret-weapon in the kitchen, adding flavor to everything from chicken and steak, to beans and dips. Give any dish south-of-the-border flair with this flavorful, all-natural taco seasoning blend made with chili powder, cumin, oregano, and other spices.
Packaged seasonings can be high in sodium and contain artificial flavors. There is no need to buy those when it is so easy to make you’re own spice blend. You can make the recipe your own by adding other spices like cayenne for heat, or smoked paprika for rich smoky flavor.

Taco Seasoning Blend

Total Time: 10 min.
Prep Time: 10 min.
Cooking Time: None
Yield: 15 servings, about 1 tsp. each
Ingredients:
2 Tbsp. chili powder
1 Tbsp. ground cumin
2 tsp. ground black pepper
2 tsp. sea salt (or Himalayan salt)
1 tsp. onion powder
½ tsp. garlic powder
½ tsp. dried oregano
Preparation:
1. Combine chili powder, cumin, pepper, salt, onion powder, garlic powder, and oregano in a small bowl; mix well.
Calories in Taco Seasoning Blend Recipe | BeachbodyBlog.com

Thursday, February 23, 2017

Pesto Zucchini Noodles with Chicken

Pesto Zucchini Noodles with Chicken
Zucchini noodles are all the rage with healthy eaters, and it’s no wonder why. They are ultra-low in calories and carbs, and they make a great stand-in for pasta. Sometimes called “zoodles,” zucchini noodles can be made with a vegetable peeler, a mandolin, or a Spiralizer, I used my Vegetti to make mine (thank you Aunt Lynn! Awesome Christmas Gift!). Their pasta-like texture is a perfect base for all sorts of sauces and toppings and they don’t get soggy like pasta does, so they are great for meal prep. Cook them gently and they’ll stay al dente until you’re ready to eat them.
In this recipe, top them with pesto sauce, sautéed mushrooms with garlic, and tender slices of chicken breast. For those using the 21 Day Fix containers, this recipe is 1½ green, 1 red, and 1½ teaspoons.

Pesto Zucchini Noodles with Chicken

Pesto Zucchini Noodles with Chicken
Total Time: 30 min.
Prep Time: 15 min.
Cooking Time: 15 min.
Yield: 2 servings
Ingredients:
1 tsp. olive oil
½ medium red onion, chopped
2 cloves garlic, finely chopped
1 cup sliced mushrooms
4 fresh basil leaves, finely chopped
2 medium zucchini
1 Tbsp. basil pesto sauce
6 oz. cooked chicken breast, boneless, skinless, sliced, warm
Preparation:
1. Heat oil in medium saucepan over medium-high heat.
2. Add onion; cook, stirring frequently, for 3 to 5 minutes, or until onion is translucent.
3. Add garlic; cook, stirring frequently, for 1 minute.
4. Add mushrooms and basil; cook, stirring frequently, for 3 to 5 minutes, or until mushrooms release liquid. Set aside.
5. Using a vegetable peeler, cut each zucchini into lengthwise strips about ⅛ inch thick. Turn zucchini slightly after cutting each strip to work evenly around the outside, stopping when you hit the seeds at the core. Discard cores. Cut slices lengthwise into ½- inch ribbons. Set aside.
6. Add zucchini to onion mixture; cook over medium-high heat, stirring frequently, for 2 to 4 minutes, or until heated through.
7. Add pesto; mix well.
8. Evenly divide zucchini mixture between two serving plates; evenly top with chicken.
Pesto Zucchini Noodles with Chicken

9 Yoga Moves to Help with PMS

PMS is just awful. There’s the erratic mood swings caused by dramatically shifts in hormone levels, the bloating, the cramps, headaches, and more. But, there are some things you can do that may help.
According to numerous studies, foods rich in calcium, vitamin D, thiamine (Vitamin B1), riboflavin (vitamin B2) can help symptoms. Consider adding these foods to your diet the week before your period: Oatmeal, flax seeds, kale, spinach, eggs, dairy, almonds, quinoa, edamame, and (in moderation) dark chocolate.
Also, getting moving may help reduce cramps, while focusing on your breath and form lets you find relief from those unpleasant emotions. Below are 9 yoga positions that may help you feel better. Hold most of these of as long as you wish. If you feel you need to place a pillow or folded blanket underneath you as you do these, do.
1. Legs Up the Wall (Viparita Karani)
This is an amazing restorative pose to do before bed. Many yoga teachers caution against inversions (going upside down) while menstruating, so this is a nice, gentle way to reap the benefits of inverting without having to go into a handstand. Placing your legs on the wall stretches the lower back (making it great for relieving those cramps) and the hamstrings. Add a heating bad to give some extra love to sore areas of the abdomen.
How to: Sit next to the wall with your feet on the floor. Breathe out and lie back so that your legs are parallel to the wall. If necessary, shift your body so that your legs touch the wall and are perpendicular to your torso.

2. Seated Forward Fold w/ heating pad (Paschimottanasana)
This forward fold stimulates the abdominal organs, including the ovaries and uterus. It also helps digestion, which can alleviate puffiness and bloating. You’ll also get a nice stretch for the spine and improve posture, making you feel nice and tall, even when you might be feeling moody and fatigued.
How to: Sit and place your legs straight out in front of you. Inhale, reach your fingers toward the ceiling, and bend forward toward your toes. Lean forward from the hips instead of bending at the waist. Bend forward as far as you feel comfortable. Hold onto the outside of the foot if you can, or simply hold the shins. After a few breaths, try stretching a little bit further, but be mindful of what feels safe and comfortable for you.
3. Yogic Squat (Malasana)
Poses that ground and calm the body do wonders during PMS. A squat helps shift energy downward which can help reduce anxiety. It also stretches the lower back, easing cramps, and the gentle pressure applied to the abdomen from your legs provides a subtle tone to the belly that stimulates the uterus and ovaries.
How to: Stand with your feet slightly wider than hip distance apart. Turn your feet so the toes face slightly outward. Bend your knees into a squat position until your hips are lower than your knees, keeping your chest up and making sure your knees do not go over your toes. Bring your palms together and place your elbows on the inside of your knees. Hold this pose for 1 minute or less. If this position is hard on your knees, place a small stool or block under your hips and sit down on it during the squat.
4. Reclining Bound Angle Pose (Supta Baddha Konasana)
This is another restorative pose to do before bed. It supports circulation, stretches the groin area, and is said to be restorative to the nervous system. A heating pad can feel great to ease cramps, but resting a pillow on the belly is also very comforting and relaxing for abdominal pain.
How to: Lie down on the floor on a mat or blanket, face up. Bend your knees and place your feet together, moving them as close to the groin area as is comfortable. Place your palms on the floor next to your hips. As you breathe, tighten your abs and shift your tailbone so that it is close to the pubic bone. This shift helps to stabilize the spine.

5. Wind-Relieving Pose (Pavanamuktasana)
Give this pose a try if you’re suffering from bloating and puffiness. This is also a great pose to open up the lower back and the hips, which can get tight and tired during PMS.
How to: Lie down on the floor on a mat or blanket, face up with your legs stretched out. Breathe out as your bring your right knee into your chest. Use your hands to bring your knee closer toward your chest. Inhale, release your leg, and place it back on the floor. Repeat the movement with the left leg.
6. Reclined Twist (Supta Matsyendrasana)
This twist stretches the upper back, shoulders, neck, hips, and spine. It stimulates digestion and reinvigorates the body, which helps to combat the fatigue associated with PMS.
How to: Lie down on the floor on a mat or blanket, face up with your legs stretched out. Tighten your abs, inhale, and lift your feet off the floor, legs touching. Place your arms out to the sides in line with your shoulders, palms against the floor. Raise your heels just slightly higher than your knees and slowly lower both legs to the left, keeping your hips and legs together. Once your legs are on the ground, aim to have your knees parallel with your hips and your feet close to your sit bones. Turn your head to the right. Repeat the movement on the other side.
7. Child’s Pose (Balasana)
Child’s pose is arguably one of the best parts of any yoga class, but it’s especially nice during PMS. Gentle pressure on the abdomen is great for cramps, and the slight stretch of the spine alleviates lower back pain as well.
How to: Kneel on your hands and knees on a mat or blanket. Untuck your toes and separate your knees so your legs are hip width apart. Breath out, lower your sitz bones toward the heels and fold forward. Place your arms on the floor stretched out in front of you or by your thighs.
8. Reclined Head-to-Big-Toe Pose (Supta Padangusthasana)
The reclined variation of this pose lets you reap its restorative benefits while stretching the lower body, improving digestion, and with it, easing bloating and cramps.
How to: Lie down on the floor on a mat or blanket, face up with your legs stretched out. Breathe out, bend your right knee, and bring your thigh toward your chest. Press your left leg into the floor, extending your heel toward the wall. Loop a strap around the arch of your foot and straighten your leg toward the ceiling. Move your hands up the strap until your arms are fully extended (if you’re very flexible you can use just your hands for this). Press your shoulder blades toward the floor to keep your chest wide. For a deeper stretch, slowly bring your leg toward your forehead, keeping your leg straight. Repeat the movement on the other side.
9. Bow Pose (Dhanurasana)
If you’re feeling sluggish and heavy, bow pose is a great way to wake up the body, and give yourself a little boost. In addition to lengthening out the front body, it’s a good pose for strengthening the back, improving posture, and relieving those pesky cramps.
How to: Lie down on the floor on a mat or blanket, face down, with your legs stretched out. Roll your shoulders, pulling your shoulder blades closer to one another. Bend your knees toward your sitz bones, keeping them hip width apart. Wrap your hands around your ankles, keeping the knees apart and your feet flexed. Breathe out, lengthening the lower back and press the feet away from the hands, to help lift your body off the ground. If you are feeling knee pain, make sure your feet are flexed and your legs are hip width apart.

9 Stretches You Can Do At Your Desk

If you have a desk job like I do, it’s likely you also suffer from tension or pain in your neck, shoulders, back, or hips. That’s because sitting for long stretches of time is not an ideal position for your body…or your health.
But, until you acquire a standing desk, here are 9 stretches you can do in the office that will relieve the pressure.

Seated Spinal Twist
Here’s a great way to release tension in your back. Sit on your chair sideways so that your shoulders and back are perpendicular to the back of the chair. Sit up straight, place your feet on the ground and place your hands on the back of the chair. Using your arms, twist, puling yourself towards the chair. Switch the side of the chair you’re sitting on and repeat. This pose stretches out the spine, chest, and neck. Take approximately 8 to 10 breaths on each side.
Office Yoga Stretches Pose Seated Spinal Twist
Cat/Cow Stretch
You only feel as young as your spine is flexible! This move can help. Sit up straight, place your feet flat on the floor, and rest the palms of your hands on top of your knees. Inhale, arch your back and look up, pulling your shoulders back as you do so. This will open up the whole front of the torso and neck. When you exhale, round your spine, pull the shoulders toward each other at the front of the body and drop your head tower your chest. This will stretch and open the back, shoulders, and neck. Do approximately 8 to 10 complete rounds.
Office Yoga Stretches Pose Cat Cow Pose

Forward Bend
When you spend hours upon hours in a seated position, the hamstrings tighten and the tighter the hamstrings are, the more they pull on the muscles of the lower back. To help avoid lower back pain caused by sitting, stand up, place your feet flat on the floor, and bend over at the hips bringing your chest toward or onto your thighs. Let your head drop loose and your arms hang beside you. Take 8 to 10 breaths.
Office Yoga Stretches Pose Forward Bend Pose

Eagle Arms
Sitting at the computer all day can do a number on your shoulders and upper back. This may help. While sitting, reach your arms straight out in front of you, keeping them parallel with your shoulders and shoulder-distance apart. Bend the left arm upward and sweep the right arm under it. Wrap your right arm around the left until you are able to grab the outside edge of the left arm or until you are able to clasp your palms together. Lift the elbows away towards the ceiling and pull your hands away from your face. Turn your head side-to-side. Repeat on the other side. This will stretch the muscles under the shoulder blades, the upper back, shoulders, and neck. Hold each side for approximately 8 to 10 breaths.
Office Stretches Eagle Arms Pose

Standing Pigeon Pose
Ok, this pose isn’t quite as discreet, but when you sit for long periods of time, your hips can get sore and this hip-opening pose can help reduce tension. To do it, stand with your feet hip-distance apart. Facing the desk, place your knee and the bottom half of your leg on the desk. Bend your knee and pull your foot towards your body. Your leg should be parallel to your body. With your left leg straight, bend towards your right leg. Hold for approximately 8 to 10 breaths then repeat on the other side.
Office Yoga Stretches Pose Standing Pigeon Pose

Chest Opener
If you have a job that requires you sit at a desk, you probably have some pretty tight chest and shoulder muscles. You can stay right in your chair for this one. Simply interlace your fingers behind you and place your arms on the top of your chair’s backrest. Drop your chin to the chest. Your chest, shoulders, and neck will appreciate it. Hold this pose for 8 to 10 breaths.
Office Yoga Stretches Pose Chest Opener Pose

Thread The Needle
Here’s another great hip opener stretch to release tension in the hips and lower back. Sit up straight in your chair with your feet flat on the floor. Cross your left leg over onto your right leg, placing the ankle of the left directly above the right knee. Thread your left hand between your legs and hold onto the back of your right thigh. Lift your legs up–using your right hand as well if you wish–until you feel a stretch in your left hip. Hold for 8 to 10 breaths and then repeat on the other side.
Office Yoga Stretches Pose Thread the Needle Pose

Hand Stretch
I bet you spend a lot of the day typing or texting. If you do, you’ll want to do this hand stretch. Stand, place both hands on your desk, palms faced down, fingertips facing your body. To intensify the stretch, lean forward. Hold the stretch until you feel the tension release.
Office Yoga Stretches Pose Hand Stretch Pose

Neck Rolls
After a long day do you notice tension in your neck and shoulders? When we are tense, it’s the shoulders that think they can hold up the weight of the world. To give them some relief,, sit up straight in your chair with your feet flat on the floor. Bring your chin toward your chest and roll the right ear to the right shoulder. To intensify the stretch, place your left hand on top of your right shoulder and place your right hand just above your left ear. Gently apply pressure with the hand on your head hand and breathe through the stretch. Take approximately 8 to 10 breaths, then switch to the other side.
Office Yoga Stretches Pose Neck Rolls
Photos by Lulu Lam.
Author: 

Send Me A Message

Name

Email *

Message *